 Click to Tweet is a simple yet elegant service that allows you to get people to tweet your content, which is also an easy way to get more traffic to your website or blog. The application and plugin are 100% free to use, all you need is a Twitter account. In this tutorial, we’ll be describing how to use Click to Tweet and some ways to get the most out of it.
Why Create Click to Tweet Links?
Click to Tweet gives you the ability to direct readers to share specific content on Twitter. You can generate links directly from the Click to Tweet dashboard after logging in. If you have a WordPress site, you can download a free plugin and get readers to share specific blog posts or pages. You can also get view analytics reports that provide you with lots of useful information about the people who tweet your content.
Many people may enjoy your content and could be willing to share it. At the same time, it might not occur to them if you don’t give them a prompt. It also takes a few steps to share something on Twitter. Click to Tweet cuts down on these steps and makes it very easy for people to share something.
How to Make Best Use of Click to Tweet
There are many social media buttons you can install on your website, including ones for Twitter. These can be useful to get people to share your content if they liked something you posted. Click to Tweet, however, allows you to focus on particular areas within your content.
In order to get the most out of Click to Tweet, you should keep several things in mind. The areas that you might want to highlight for tweeting include central points of your article. Look for areas in your content that emphasize crucial points. For example, if you are writing a post about getting more Twitter followers, you might want to highlight something like:
“This is how I got 10,000 new followers in under a month. Click to Tweet.”
Remember that when people read your content, they are not only looking for useful information but also items worth sharing. If your readers are interested in social media, the above sentence is an example of something that people might want to tweet on your behalf.
Some of the things you may want people to tweet include:
* The release of a new product or service
* Statistics or research that point out an important or surprising fact
* A discount or special offer -e.g. book giveaways or discounts on Amazon, your free e-book, trial memberships, etc
* Any phrase that sums up the key points of your article or perhaps your entire blog or business
Track Your Results
With any type of marketing tools, it’s important to track your results. Click to Tweet makes this easy, as it provides analytics such as total clicks, unique clicks, dates and the location of the clicks. This makes it possible for you to test different topics and keywords and see what people are more likely to share. It also helps you target certain locations, which is information that can be carried over to various types of SEO and paid advertising. For example, you may find that people in a certain city or country are especially interested in a certain product or topic.
Choice of Plans for Click to Tweet
There are three levels of membership for Click to Tweet. While the basic version is free, once you see the benefits you can enjoy, you may decide to upgrade. Here are the features that are available with each plan.
* Standard: Free. Up to 5 links. Automatic URL shortening, link tracking, full analytics.
* Pro Plan: $4.97 per month. Unlimited links with all the features of Standard.
* Expert Plan: $49.70 per year. Includes all the features of Pro but gives you two free months.
Benefits of Click to Tweet
Recent statistics indicate that there are currently more than 300 million active Twitter users. This makes Twitter an extremely powerful platform for gaining traffic, no matter what type of website you have.
People’s attention spans are getting shorter all the time. This means that even if they like something, they may not bother to share it unless the process is extremely simple -and you remind them. Click to Tweet is an application that does both. It allows you to select exactly what you want and make it extremely convenient for people to share it.
When you edit or create blog posts using the Click to Tweet WordPress plugin, you will then be able to choose any text you want as a Twitter message. You will highlight the text (remember that tweets can only be up to 140 characters long) and then click on the Click to Tweet icon which will now be visible on your dashboard. This will give readers a strong prompt to tweet something in your post, which will lead their Twitter followers back to your blog.
How to Use the Click to Tweet Website
To start using Click To Tweet, you simply sign up using your Twitter account. From the dashboard, you can create the message that you want people to tweet.
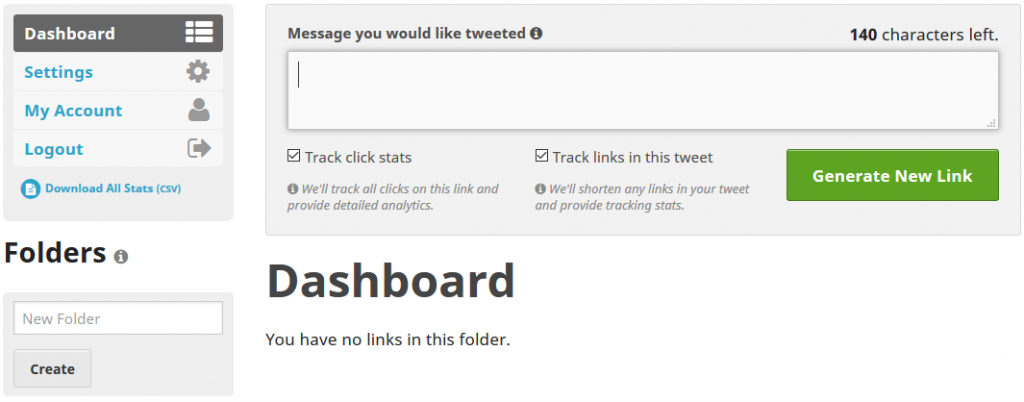
After you have entered the message and the link(s) you wish to have others tweet, you have two checkbox options to select from:
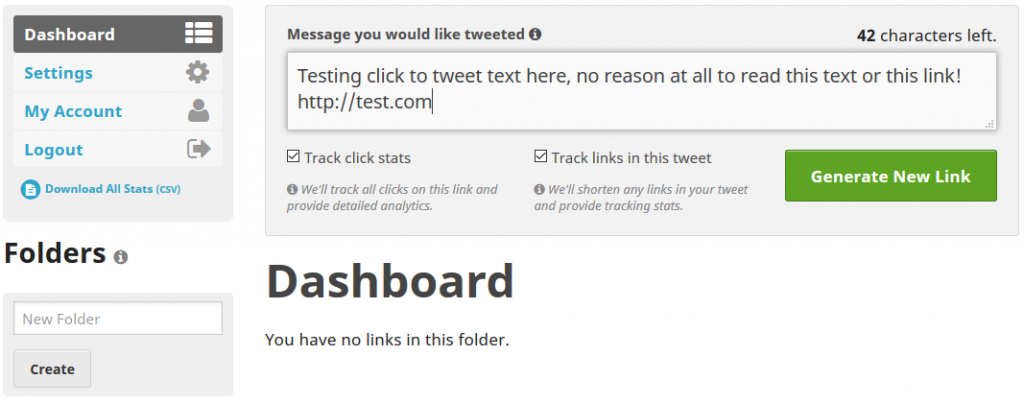
Track click stats – Selecting this option means we’ll track all clicks on this link and provide detailed analytics. If you do not want the link to count toward your tracked link limitation of 5 (unpaid accounts only), select this option.
Track links in this tweet – By selecting this option we’ll shorten any links in your tweet and provide tracking stats. If you wish to have your links remain unchanged, simply unselect.
Once the required options have been selected or unselected, click on the “Generate New Link” button.
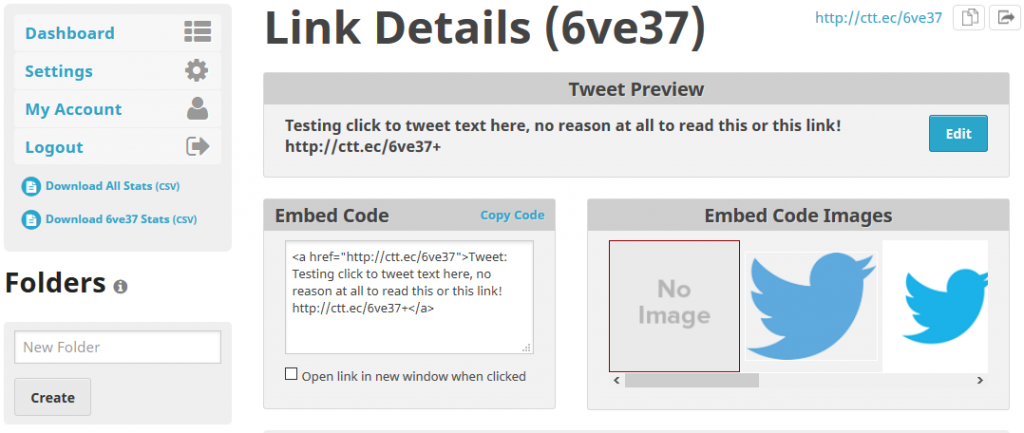
The link has now been created! On the “Link Details” page that is displayed you can test the new URL, copy the new link, select an image, copy the embed code, and many other options.
So what does the link that you just created actually do? Here’s the link we created above, try clicking on it to find out:
Pretty cool, right? Hopefully, you didn’t actually tweet that, but the message is automatically inserted into your Twitter status box, and all you do is click to tweet! Here’s what the embed code with an image looks like for the same test link:

You now paste just the link itself (starts with ctt.ec) or the embed code on any website, blog, press release, email, or anywhere else you’d like your content to be shared! Keep in mind that the embed code can only be pasted where HTML is allowed.
Also, if you ever need to edit your links in the future, this page allows you to accomplish this task even days or weeks after sharing your content.
![]()
If you choose to track click stats (CTT Links) and/or the links in your tweet (Embedded Links), once your link is shared by others and receives clicks the chart will display historic click data for the date ranges available.
We track both the links that you create (CTT Links) as well as any links that you entered into the message and we automatically shortened for you in order to track (Embedded Links) and display data for both in this section of the “Link Details” page.
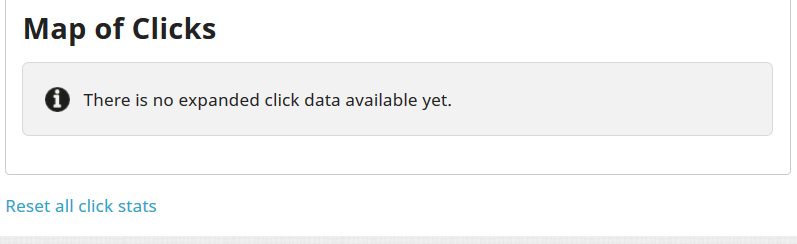
We also track the location of clicks made on your links, so once data is available a clean representation of the geographic location where clicks originated can be found on this map.
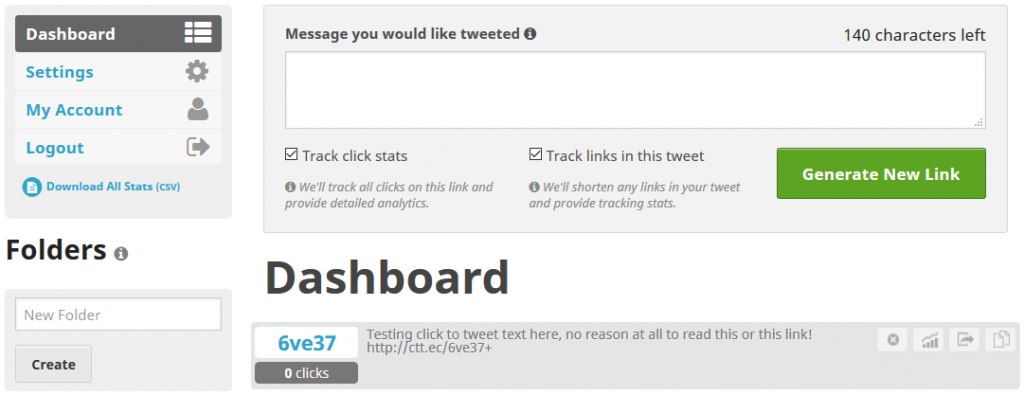
After your links are created, you now see each one displayed in the Dashboard as well as quick click stats for reference.
From here you can create folders to organize your links by creating a folder and simply drag/drop each link into the desired folder to move it. You can also rename and delete folders from the Dashboard.
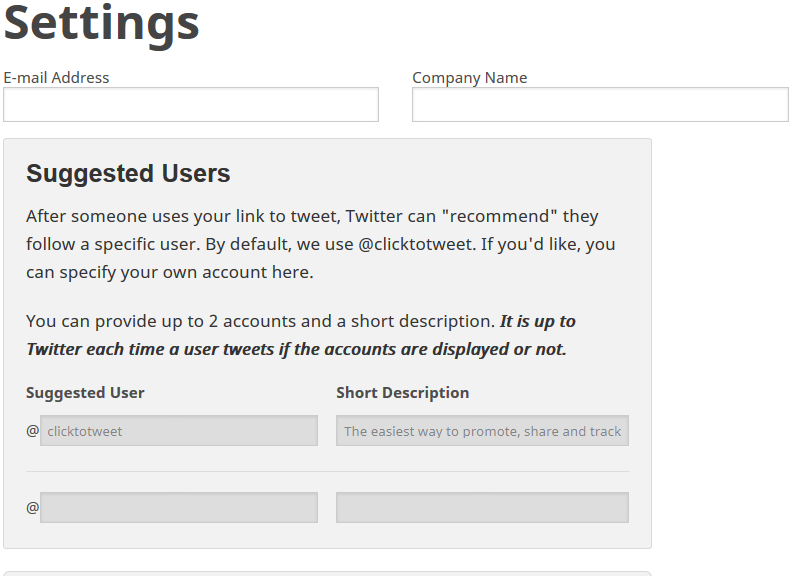
If you need to change settings, including the Twitter account that is displayed after a user tweets your message, select the “Settings” page.
Our research has shown that using this option results in a huge increase in Twitter followers while NOT violating any terms of service.
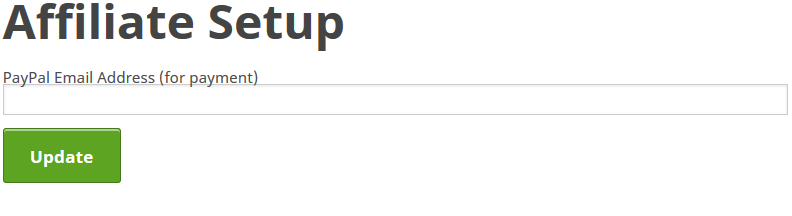
If you’d like to earn commission just for telling others about Click To Tweet, enter your PayPal email address for payment and signup! Once you do your individual affiliate code link that you can start sharing right away will be displayed.
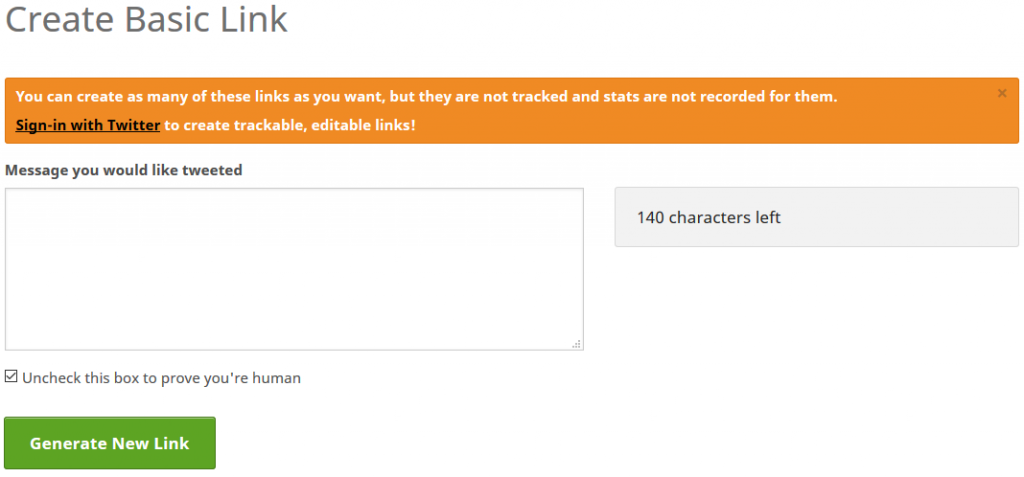
Don’t need link stats, tracking, demographics, or any of the other features offered above? We’ve got you covered too!
Our basic link generator is how we got started years ago, check it out for a much simpler interface.
How to Use the Click to Tweet WordPress Plugin
There are 2 different ways to quickly and easily get this plugin installed on your website, listed below for your reference.
WordPress Administrator Panel
WordPress admin section installation is the easiest option to install a plugin as WordPress handles the file transfers itself. To complete a WordPress admin section installation for the Click To Tweet plugin, you’ll need to log in and navigate to the “Plugins” menu. Click on the “Add New” option at the top of the page.
In the search field at the right side, type “click to tweet” and perform the search. The first plugin listed is ours! Once you’ve found the plugin in the search results, you can view the details about it such as the point release, rating and description. In order to install the plugin, you just need to click “Install Now” and you will be asked if you’re sure you want to install the plugin. Please click “Yes” and WordPress will automatically complete the installation process.
Within the configuration file of your website, if “FS_METHOD” is set to direct and you try to install the plugin from the admin section, it will prompt you to fill in the FTP credentials of your website and upon posting the same, it will install the plugin.
Using File Transfer Protocol
The manual installation involves downloading the Click To Tweet plugin from the WordPress directory and then uploading it to your webserver via the FTP application. In this case, you need to perform the following steps:
1. Download the plugin file to your computer and unzip it.
2. Using a FTP application, or your hosting control panel, upload the unzipped plugin folder to your WordPress installation’s wp-content/plugins/ directory.
3. Activate the plugin from the plugins menu within the admin section.
Final Step
Once you are finished with the installation process, head over to the Settings -> Click To Tweet menu in WordPress to ensure you can connect with your Twitter account.

Configuration
After installing the plugin you need to login to WordPress admin panel for your website and go to the “Settings” section. Under “Settings”, you will find a new item “Click To Tweet”. Once selected, the “General Settings” tab can be seen. Two options can be found here as follows:
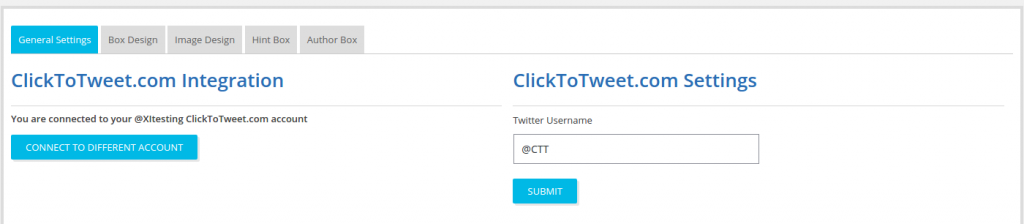
1. Connect to different account
To access the general plugin settings, sign in with your Twitter account. If you have already logged in with your Twitter account and wish to change it, then you may click to connect with a different account.
2. Twitter username
In the right-hand side of the screen, the user can also enter the twitter username and click on submit to save it. Username can be changed from here at any point of time.
How To Use
Now it’s time for the fun part! Here is how to create a “tweetable link” in a page or post with the use of the plugin. Once on the page or post you’d like to add a link to (this can be a new or existing page or post), you’ll see a small bird added to the editing menu.
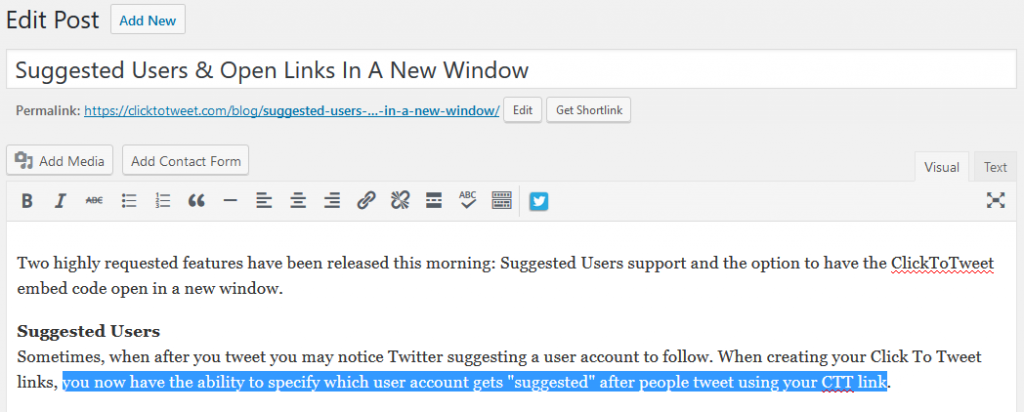
Select the text you want to show in the Twitter box by either writing it manually or selecting it from the blog content and click on the blue Twitter bird icon. Below is a screenshot of the pop-up that appears:
You can now create new or insert an existing tweetable link. At the top you will see three tabs:
* Create a new CTT
* Select a theme
* Insert Existing CTT
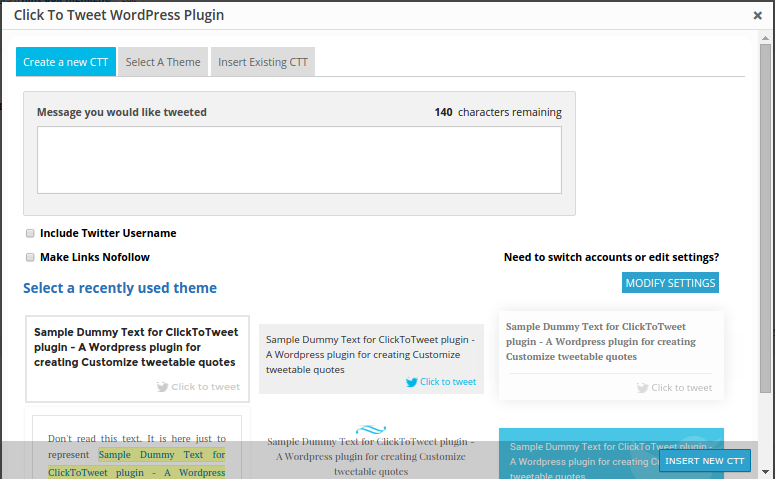
Create a new CTT
Under “Create a new CTT” tab, the user can view the text (which can either be manually entered or already selected portion of the text from the blog post) in the “Message you would like tweeted” box. It has a word count limit of 140 characters, so be sure to use the characters wisely! Below the message box, there are two checkboxes:
1. Include Twitter Username
The first checkbox needs to be ticked if user wants to include Twitter User name at the end of the tweet when shared on Twitter. This is useful for users who want to insert their usernames and want “via” to be displayed. In this case, you need to include your Twitter Username in the Click To Tweet Plugin settings.
Once your Twitter username is saved, this can be embedded into your tweets at any point of time just checking one box in the plugin.
2. Make Links Nofollow
The second box is for our new more SEO-friendly nofollow option. Simply select or unselect to add or remove the nofollow attribute to links. The concept of Nofollow is nothing but an HTML attribute value, used to command the search engines bots that a hyperlink should not influence the link target’s ranking in the search engine’s index. A Nofollow link is created with the Nofollow link HTML tag, which looks like:
<a href=”http://www.website.com/” rel=”nofollow”>Link Text</a>
It is a notice sign for search engines saying “don’t count this”.
At the bottom of the pop-up you will find the option to select recently used themes and you can select either of them or move to the next step of selecting a theme.
Select a theme
Under the “Select a theme” tab you will find four sub-tabs from where different designs can be selected in order to make tweetable boxes and text look much more visually appealing. Each of the tabs will display the look and feel of the text to be displayed in the blog.
The Box Design
This area showcases 12 box templates to select from and use for a custom touch in any blog.
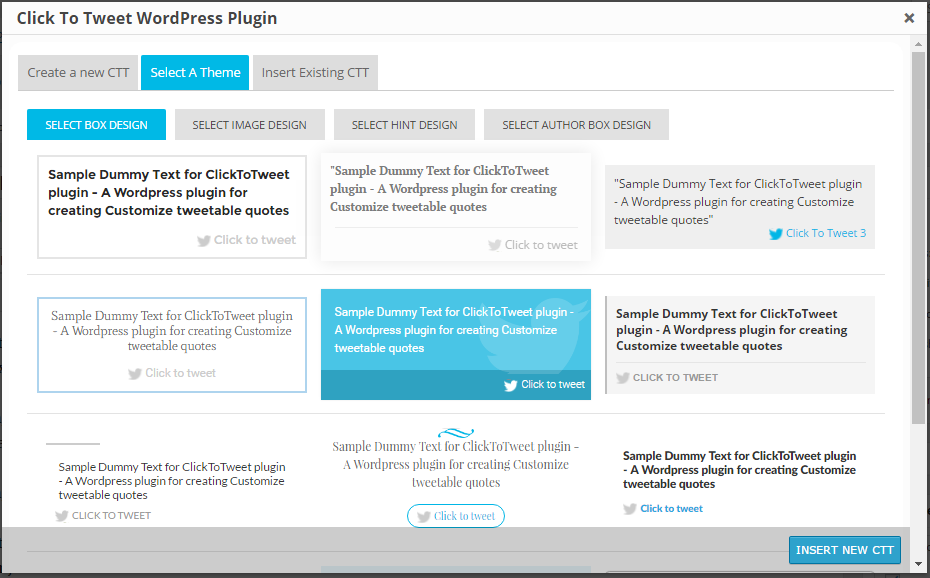
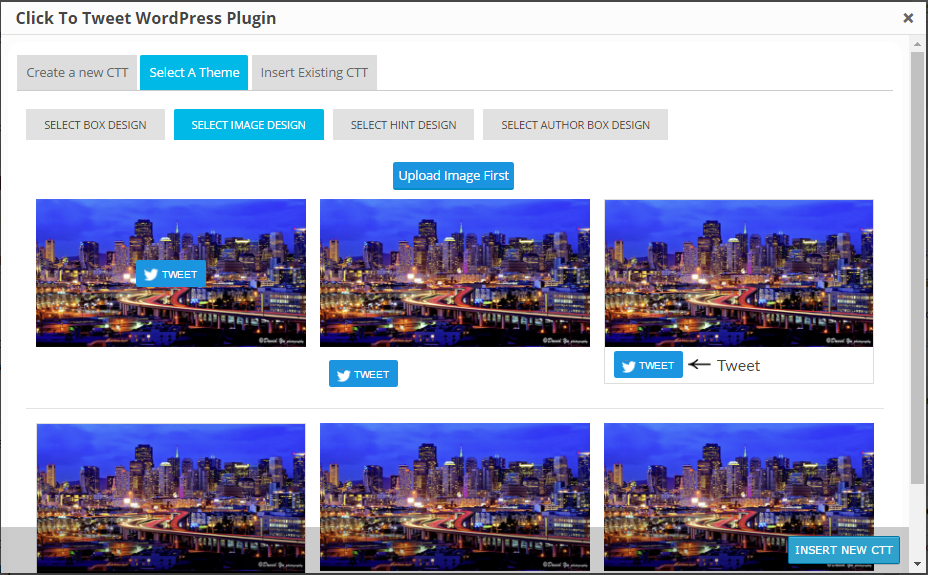
The Image Design
Offers the user to select any of the 6 available template images or the user may select another image from the computer via “Upload Image First” button.
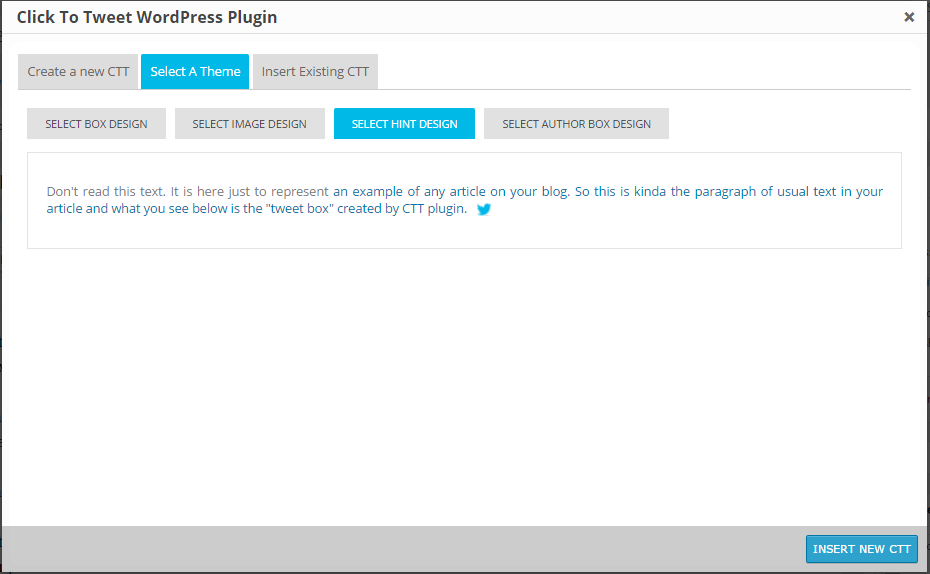
The Hint design
This will display the text design selected for tweeting and can be used for a very simplistic design option.
The Author Box Design
Enter author name in the box and upload an image of the author. The user can manage author name and author’s thumbnail accordingly.

After the theme has been selected and message you’d like others to tweet is ready, click on the “INSERT NEW CTT” button. After clicking on “INSERT NEW CTT”, the shortcode is inserted in the editor.
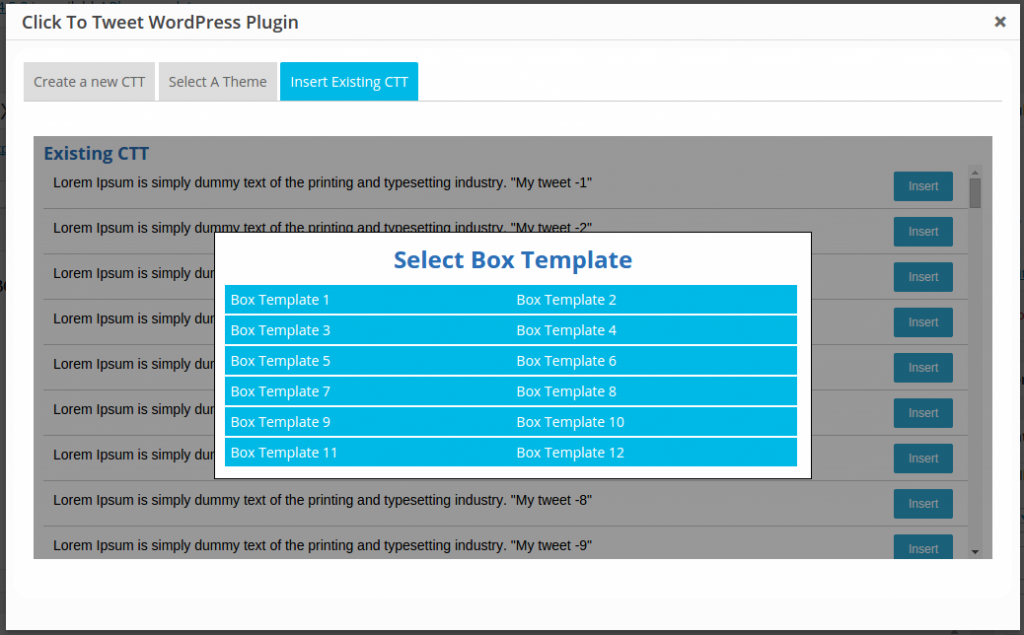
Insert Existing CTT
Displays previously used and created tweet text. Simply insert any of the previously used texts by clicking any of the “Insert” buttons displayed on the right side. When clicking on “Insert”, a prompt appears asking users to “Select Box Template”. After selecting the template shortcode will be inserted in the WP editor.
Change Template Settings
The plugin allows you to customize templates by changing the color, font, or text, then save it for future use. The user can preview the changes made in realtime, on the left hand side of the screen. Below are the tabs from where templates can be customized and served for use.
Box Design
Box design is the second tab under “Settings”. It displays your tweet content in a stylish box. This may entice the users to read the box content at a glance and may get blog viewers to tweet your message.
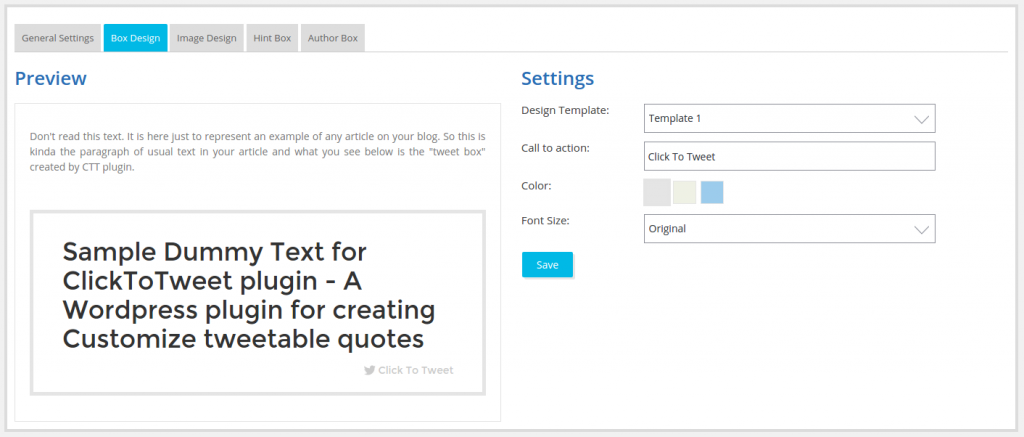
Under the box design tab, users can see the screen divided into 2 parts: Settings and Preview.
Design template – The plugin offers 12 design templates to choose from.
Call to Action – It helps to change the text of the button and you can choose appealing names.
Color – The color tab offers three color options to choose from.
Font Size – The font size offers the user to select either original, small or large font size of the text within the tweet box.
After clicking on the “Save” option, the user can preview the content in the preview box. It will represent just an example of any article on your blog created by the plugin.
Image Design
Similar to Box design, the Image design divides the screen into: Settings and Preview.
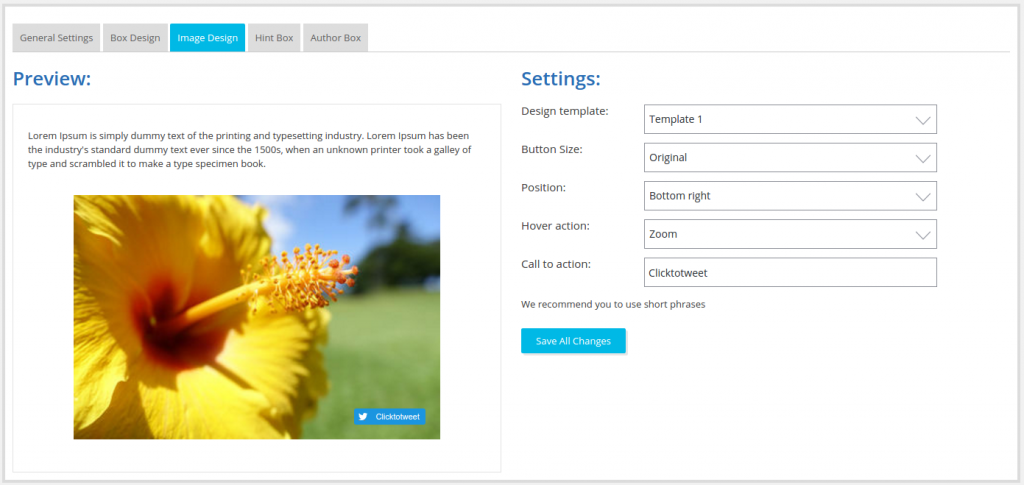
Design template – The Design template offers six templates to the users, where the user can select any design template to display the content. There are six templates to support it.
Button Size – The button size helps the CTT users to manage the Tweet button size in the box. The user gets two option to either keep its size original or large.
Position – The position tab helps to manage the position of the tweeter icon, either keep it left or right.
Hover Action – The hover action contributes to manage the hover effect of the image template. The user can keep it either light, dark, zoom or no hover effects.
Call-to-Action – This tab writes down the content for tweeting.
After clicking to save all the changes, the user can preview the content in the preview box. It will represent just an example of any article on your blog created by the plugin.
Hint Box
The Hint box is meant to display the text selected for to Tweet. Similar to other tabs, the hint box has also divided the screen into preview and settings.
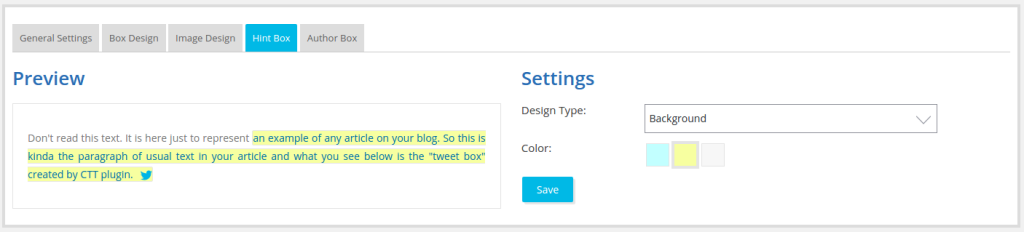
The settings has the option of: Design Type and Color.
Design Type gives the option for how to display the text in the tweet box. The user can either keep the content highlighted or underlined. If user selects the option of “background”, then the user will get the option to choose the colors too. After making the appropriate selection, and saving the changes, one can see the preview.
Author Box
The author box offers how to display the author tweet.
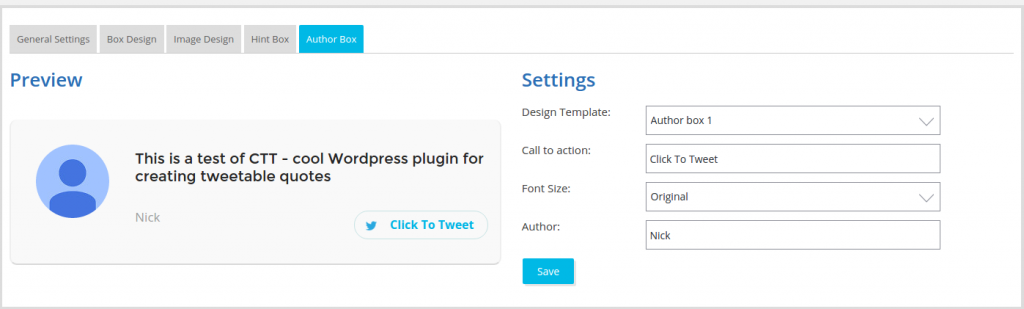
It also divides the screen into two parts: Settings and Preview.
Design template – The design templates help to display the type on tweet box. There are three templates in the plugin.
Font size – Font size selects to keep the text either original, small or large.
Author – In the author button, the user can enter the author name and proceed to save the changes.
After saving the changes, it can be previewed on the left-hand side of the screen and can be used from the front end panel of the plugin.

8 Trackbacks